Showing posts with label photo tutorial. Show all posts

Sunday, June 25, 2023

Hole-y Double-Knits, bat-people!

This tutorial shows how I made the eyelets for the drawstrings in my Hornpipe Bag pattern. It's also good for buttonholes in double-knitting, in case you endeavour to a double-knit cardigan or vest.

For this tutorial, I'm using two colors of worsted weight yarn, Fresh Green as the Main Color (MC) and Off-white as the Contrast Color (CC), for good contrast and so the stitches are a bit larger and visible for you.

While the numbers and spacing are for my Hornpipe Bag, I hope you'll be able to apply this tutorial to other projects as well.

At Rnds 64 and 65, the chart directs you back to the written instructions. Here's what rnd 64 says:

Rnd 64: [Work 6 sts as established, *cast-off 6 sts working them in their same colors, work 13 sts as established (20 sts worked per * * repeat); repeat from * 6 more times, cast-off 6 sts working them in their same colors, work 3 sts as established] twice.

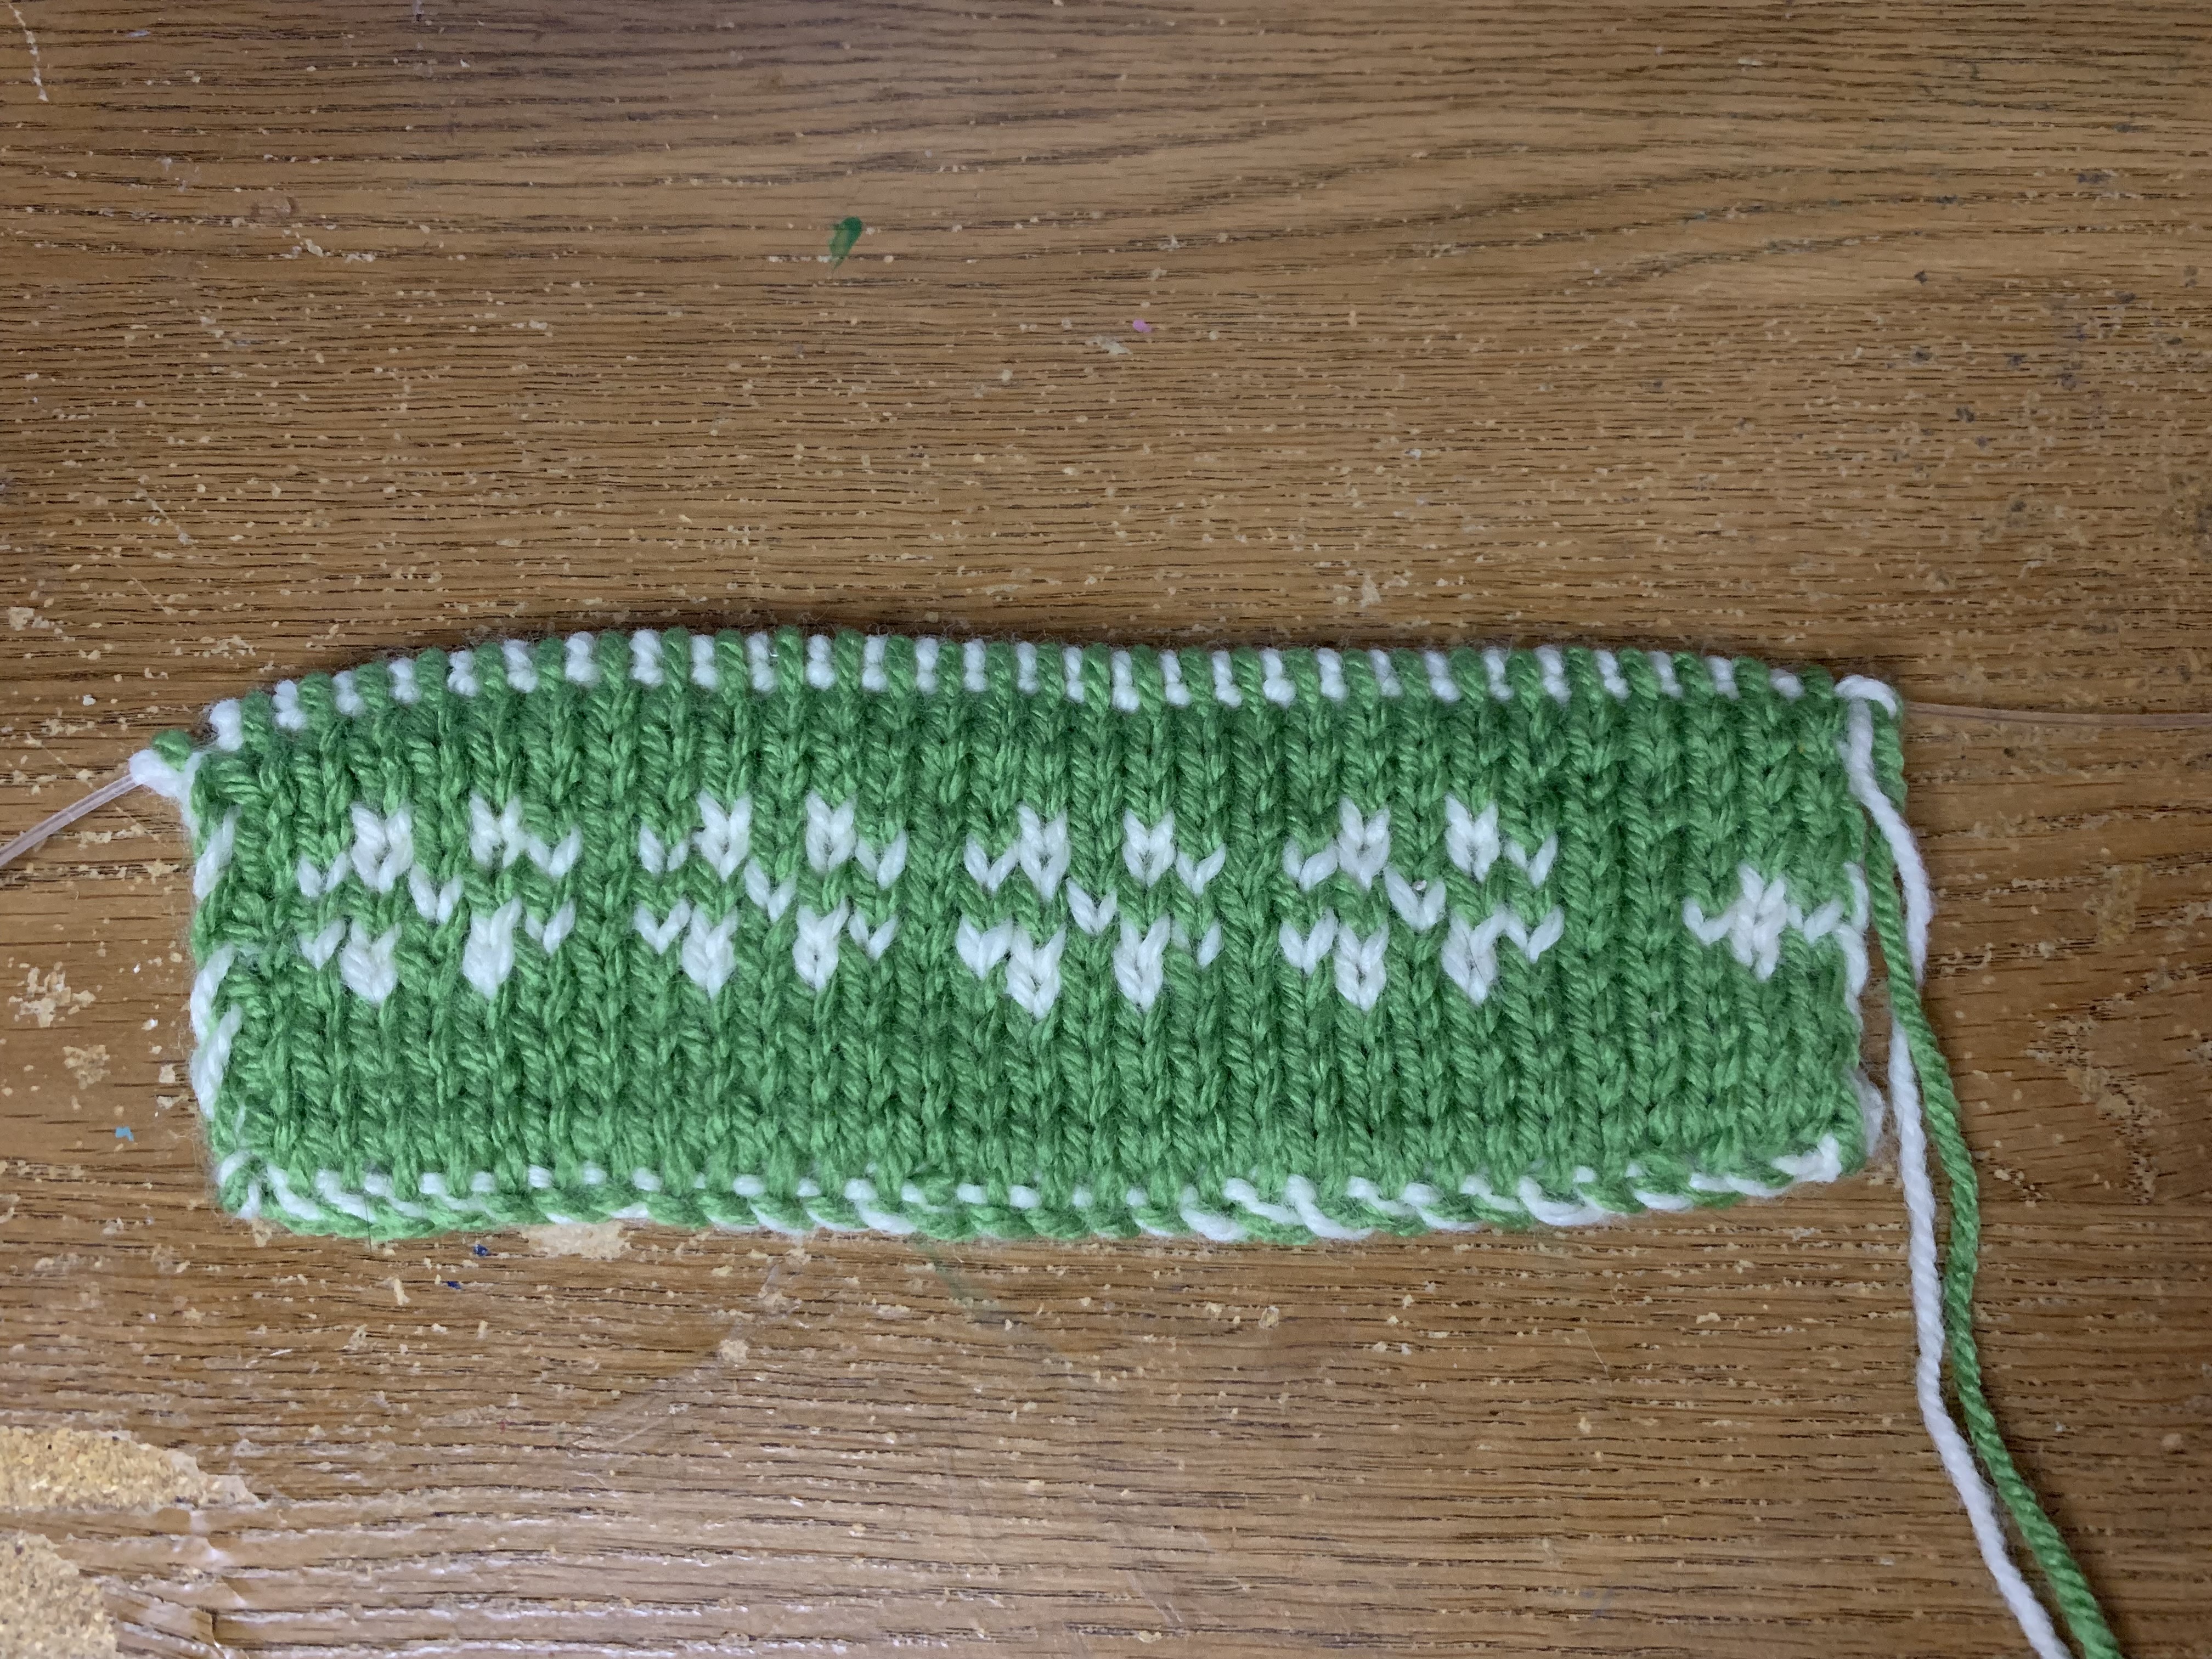
And here's what my "bag" looks like ready to start rnd 64: 

Ok, so I work 6 sts as established:

... and then cast-off 6 sts, working them with their same color:

Now you work 13sts; you'll have 14 sts to the left of your eyelet because of the stitch that was used to cast-off the last eyelet stitch:

And you repeat these steps to the end of the round as it's lined out in row 64. Here's all of my eyelets done in my tutorial swatch:

Onto rnd 65. I'm going to break this down line by line.

 Rnd 65: *Work sts as established until you reach an eyelet. Turn the piece. (Before you ask: yes, this is worked the same in both working in the round and working flat):

Next step:
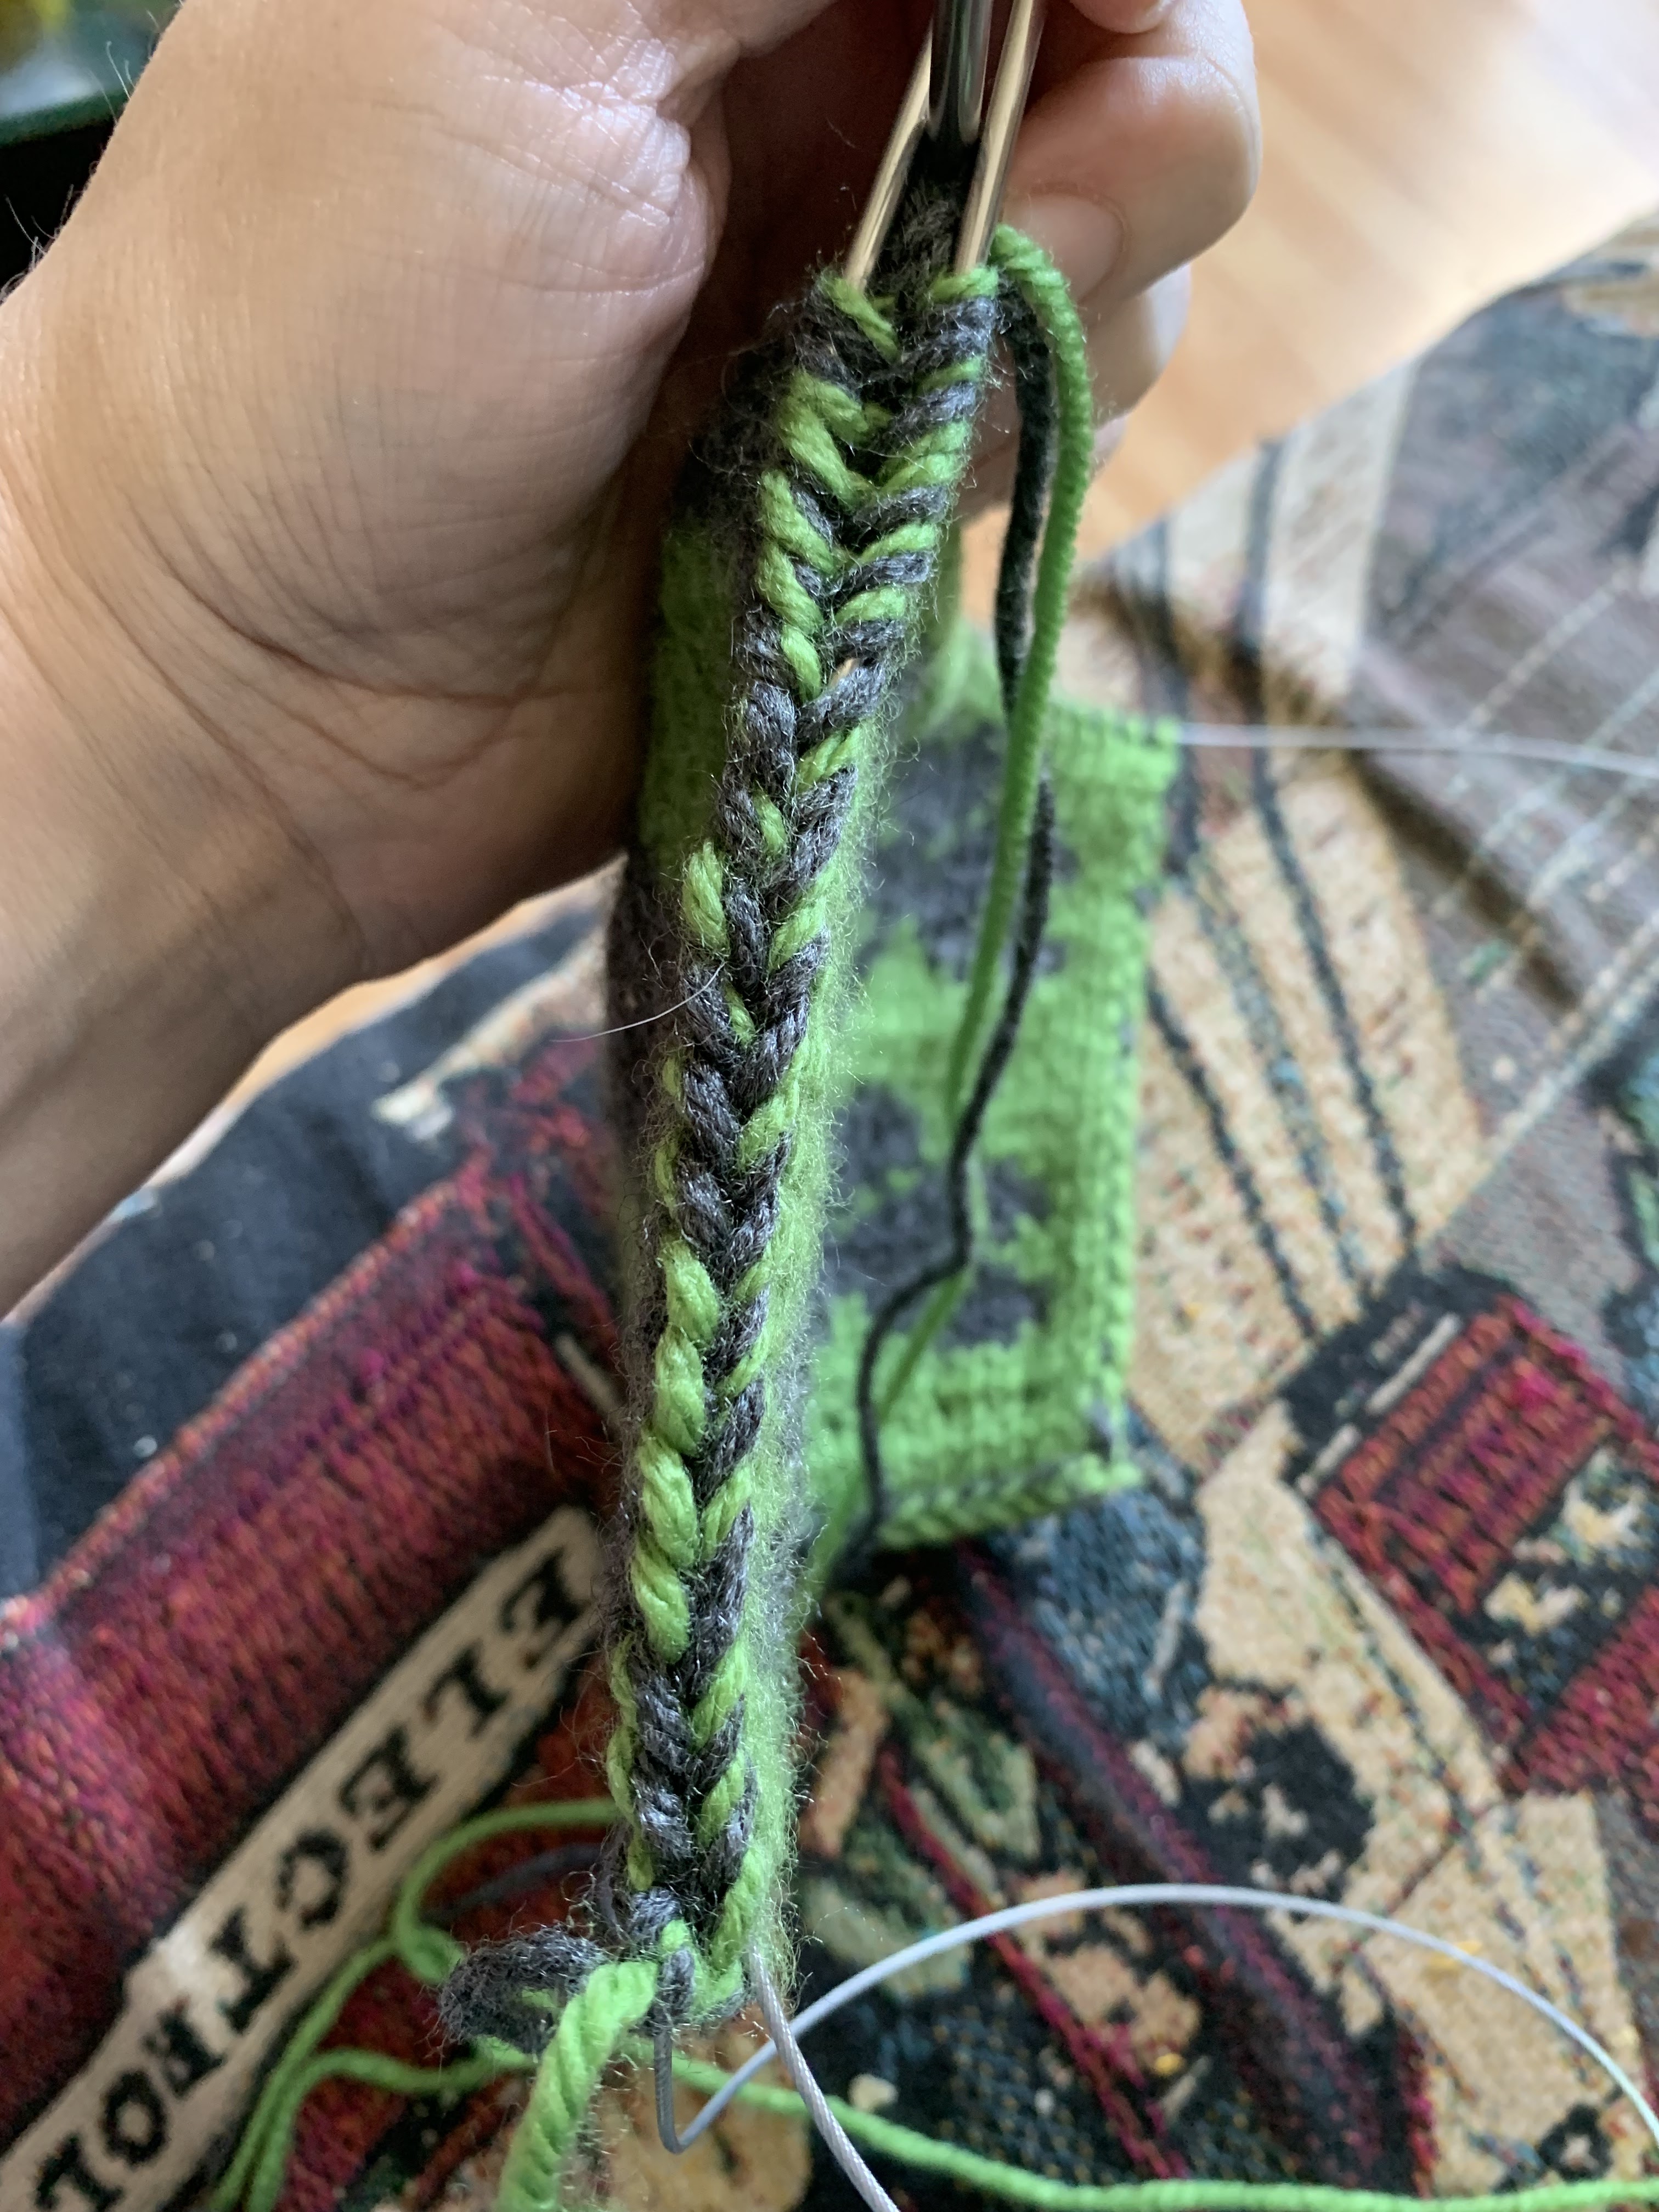
**Insert the right needle into the 2nd st on the left needle as if to knit it through its back loop:

Using the same color as this stitch, draw through a loop:

... and place it on the left needle. One new stitch has been cast-on.:

Now insert the right needle into the 2nd stitch on the left needle as if to knit it:

Using the same color as this stitch, draw through a loop:

... and place it on the left needle; a new stitch has been cast-on.:

Repeat from ** twice; you've cast on 6 new sts total:

Turn the work and repeat working from the * (ie the beginning of rnd 65):

One other thing I should mention that you're probably noticing about my swatch. The Contrast Color strands are looking a bit crossed over each other. It's mostly undetectable once those sts are worked into on the following rnd/row, but I also recommend when knitting flat (as I am with the swatch) to always do the casting off of your eyelets on a Right Side row, so this bit of crossing is on the Wrong Side/inside of your finished item.


And there you have it! This concludes my photo tutorial on eyelets (or buttonholes) in double-knitting.

Wednesday, June 15, 2022

Picking Up and Working Stitches Reversibly, a double-knitting technique

This tutorial is for my Hornpipe Bag pattern, and shows how I went from knitting the base flat in rows to knitting the sides of the bag in the round.

For this tutorial, I'm using two colors of worsted weight yarn, Fresh Green as the Main Color (MC) and Charcoal (gray) as the Contrast Color (CC), and two circular needles: the working needle is a 3.75mm (US 4), while the needle used for picking up the selvedge stitches is a 2.5mm (US?). I used a 3.5mm crochet hook for casting on my stitches. (Need a photo tutorial for the crochet cast-on? I have one on this blog here.)

(Please note that the demo piece has a different stitch count and motifs than the base in the pattern. I've given the correct numbers for the pattern throughout this tutorial.)

This is where your base is at:

The work is ready to work a right side row. You're going to pick up and work the stitches reversibly, working the first round of the sides chart instead of continuing to work flat.

Step 1:
With MC K2tog (this is the first MC st and the double stranded selvedge st), then with CC P1. Here's working the K2tog:

And how things look after working the P1:

Work across the next 74 sts (37 st-pairs) on the needle according to the chart.

With MC, K 1, with CC P2tog (this is the last CC st and the double stranded selvedge st). This is positioning the needles to work the P2tog:

And here's the result:

You have 78 sts (39 st-pairs) on your working needle. Place a marker and don't turn the work.

Step 2:

You'll notice the selvedge on each side of the base looks like a column of Vs. This is the left side:

Note that the yarns are in position to start working down this side.

Starting at the bottom of the left side, thread the spare circular needle through all of the right legs of the selvedge edge stitches until you reach the top. Here's the first 12 or so picked up:

And here they're all picked up:

Using the opposite end of the spare circular needle, thread it through all of the left legs of the selvedge edge stitches. You'll want to turn the base over to do this; here's the left side of the Vees getting started:

Once you've picked up everything, you should have 27 legs on each end of the holding circular needle. Here are all of mine picked up:

Hold the two ends of the holding needle together, as if you're going to work a 3 needle cast-off:

You'll be working the stitches off the holding needle onto the working needle. This does feel very tight and awkward. I recommend using a pointy needle for this, even if you use a double pointed needle to "grab" the new stitches and slip them onto the working needle. This is what I did with the fingering weight yarns and smaller needles of the bag; I didn't need to with the worsted weight yarns in this tutorial.


*Make sure both colors are at the back of the work. Using CC, K the first leg on the front needle:

Bring both colors to the front of the work and using MC, P the first leg on the back needle.

Bring both colors to the back and using CC, K one strand of the first leg on the front needle. Here's what it looks like to work into only one strand of a leg:
(It doesn't matter which strand you work into first. I go for the closest one rather than lifting one over the other. The strands were twisted together as you worked the selvedge so do what's easiest and don't stress.)

Bring both colors to the front and using MC, P
one strand of the first leg on the back needle.

Bring both colors to the back and using CC, K the remaining strand of the first leg on the front needle.

Bring both colors to the front and using MC, P the remaining strand of the first leg on the back needle.

What do you have at this point? You've turned 2 selvedge Vees into 6 sts (3 st-pairs). Which is the proper ratio for picking up sts along a stockinette edge: 3 picked up sts on each side for 4 rows of knitting.

Repeat from * until 3 legs remain on the front and back tips of the holding needle.


Work the last 3 legs without separating the strands so you end with 78 sts (39 st-pairs) on the side.** PM. Here's what you have along that side:

You're halfway through!

Step 3:
Here's what the crochet cast-on edge looks like:
It has a similar row of Vees like the side selvedge did.

Work across the cast-on edge of the base section, using MC for the Ks (legs closest to you) and CC for the Ps (legs away from you) working without separating the strands of the legs. You’ll have 78 sts (39 st-pairs) across the cast-on edge. PM. Here's the cast-on edge all worked into:
Note that the top and cast-on edges match. This is also setting up the color blocking of the sides.

Step 4:

Starting from the top of the base section, thread the spare circular needle through the legs of the selvedge sts as you did for the first side. The right legs of the (upside down) Vees picked up:

And both legs picked up:

Work from * to ** above. (This is exactly what you did for the first side, the legs just slant the other direction.)

PM for beginning of the rnd:


There are 312 sts (156 st-pairs) in total. You've picked up and worked all of the needed stitches from the base reversibly, and worked your first round of the sides chart. 


Continue working rounds 2 through 63 according to the chart.


I'll have another photo tutorial on working the eyelets for the drawstrings on rounds 64 and 65 for you soon.


Monday, May 16, 2022

Starting & Finishing Cabled Motifs

I was recently contacted by a lovely knitter who was puzzled about knitting my hat pattern, Anchors & Ropes. I was able to help her through email but it occurred to me that others might find a little photo-tutorial a useful thing when knitting the anchors. And there'll be a knotwork motif in my Countess Cathleen that you haven't seen as yet. Considering I've only just recently finished knitting the hood ;)

I learned to knit knotwork cabled motifs from Alice Starmore's brilliant books "The Celtic Collection" and "Aran Knitting". And while the anchor in my Anchors & Ropes hat came from a stitch dictionary published in around 2005 (I knit the original Anchors & Ropes hat in the fall of 2009), it uses pretty well the same method put forward by AS. This has continued to be the way I start, and end, motifs that need this rounded shaping.

Enough background! Let's jump into how to start a motif.

I'm working with worsted weight yarn on size 4.5mm (US7) needles for both sections of this tutorial. The knotwork shown is a swatch for my Countess Cathleen pattern; the final pattern may not look the same. I haven't decided which of my knot motifs I like best. I've only created five possibilities for this design ;) 

(For knitting in rounds, you'll need to knit where it says purl in steps 3 and 4 of the starting a motif section.)

Starting a motif:

Step 1:
Work to where the pattern says to start your motif.

Step 2:
In the next stitch, you'll work 3 stitches. First by knitting into the back and then the front of the stitch:

Then by knitting into the vertical line that sits on top of those  2 stitches:

Here's the 3 sts completed:

Step 3:
In the next row, purl the first new stitch, work (purl, yarnover, purl) into the second new stitch, and purl the third new stitch:

Step 4:
On the next row, work the stitches as the pattern tells you, remembering to purl the yarnover through its back loop to twist it and avoid a hole:


And there you have two 2-stitch strands to work your cables from. The anchor motif I used in Anchors & Ropes has a pair of additional increases on either side of the first 1-into-3 stitch, which are knit on the next round; the anchor's arms are made of 3 stitches rather than 2. A slight variation that shouldn't cause you any pause.

Ok, now how do you close up those stitches that you've added into the fabric of your knitting? You could decrease them away over a few rows, but if you're working a knotwork motif it won't resemble the beginning.

Ending your motif:

Step 1:
Look at the stitches of your motif; you have 5 needing to be reduced down to 1. I've numbered them for you in this photo:
Note that stitch 3 is a purl stitch between the two pairs of stitches that have been the strands in your motif. 

Step 2:
Slip stitches 1, 2, and 3 to the right needle, purlwise (don't twist stitch 3 throughout this process):

Step 3:
Lift stitch 2 up and over stitch 3, letting it drop off the needle as if you cast it off:

Step 4:
Slip stitch 3 back to the left needle:

Step 5:
Lift stitch 4 up and over stitch 3, letting it drop off the needle:

Step 6:
Slip stitch 3 back to the right needle:

Step 7:
Lift stitch 1 up and over stitch 3, letting it drop off the needle:

Step 8:
Slip stitch 3 back to the left needle:

Step 9:
Lift stitch 5 up and over stitch 3, letting it drop off the needle:

Step 10:
Purl stitch 3:


Ta-da! Your decrease is complete, and the top of your motif has a similar rounded shape to the bottom of it.

If your motif has more stitches per strand, alternate passing stitches over the center stitch until all of the strand stitches are gone.

I hope this helps you with the start and end of these types of cabled motifs! They're so much fun to knit :)

Yours in yarn and woolly knotwork motifs,
Síle